If you’re looking up how to blow out hair without a round brush, you can still get that smooth, bouncy finish at home. The trick is using the right airflow direction, steady tension, and a method that matches your hair type.
What makes a blowout look like a blowout (even without a round brush)
A blowout is basically two things: a sleek surface (less frizz, more shine) and a flattering shape (lift at the roots, a soft bend at the ends).
You don’t need a round brush to get there. You need:
- Downward airflow (roots to ends) to smooth the cuticle
- Tension on small sections so hair dries “set” instead of fluffy
- A cool-down step (cool shot or rollers) to lock in shape
Keep those rules, then pick one of the methods below.

Quick prep for a cleaner, longer-lasting blowout
Get hair to “damp, not dripping”
Towel-dry, then rough-dry with your hands until hair is about 70–80% dry. Shaping works best when you’re not fighting excess water.
Use lightweight products in the right order
Start with heat protectant. Add either mousse at the roots for volume or a light blow-dry cream on mid-lengths and ends for smoothness.
Save oils for the end. Heavy product before drying can flatten volume and make hair look greasy faster.
Set your dryer for control
If you have a concentrator nozzle, use it. Start with medium heat and medium airflow so you can smooth, not just blast-dry.
Use high airflow only when rough-drying, then switch down for shaping. Finish each section with a quick cool shot if your dryer has it.
Sectioning that makes everything easier
Clip your hair into sections (at least 4; more if it’s thick) and work bottom-to-top. Smaller sections need fewer passes and hold shape longer.
Method 1: Paddle brush and dryer (closest to a classic blowout)
This is the best all-around option for a smooth blowout without a round brush, especially on straight to wavy hair.
Step-by-step technique
Work on one small section. Place a paddle brush under the hair and pull with steady tension from roots to ends.
Follow with the dryer, nozzle aimed downward along the hair shaft. Move slowly enough that the section goes from warm to dry.
For a soft bend, slightly rotate your wrist inward on the last inch, then use a cool shot for 2–3 seconds to set.
Root lift shortcut
Lift the section at the roots first for a few seconds, then smooth down the length. For extra crown volume, dry the crown in the opposite direction, then flip it back when cool.

Method 2: Blow-dry, then set with rollers (best for bounce)
If you want that airy, bouncy “fresh blowout” look, rollers do the shaping for you.
How to use rollers for a blowout shape
Blow-dry until hair is 90–95% dry and still warm. Roll smooth sections with gentle tension, especially at the ends.
Use larger rollers for a blowout bend (not curls). Place rollers at the crown and around the face first for the biggest visual impact.
Let rollers cool fully (10–20 minutes), then remove and brush out softly. Finish with a light, flexible hold spray.

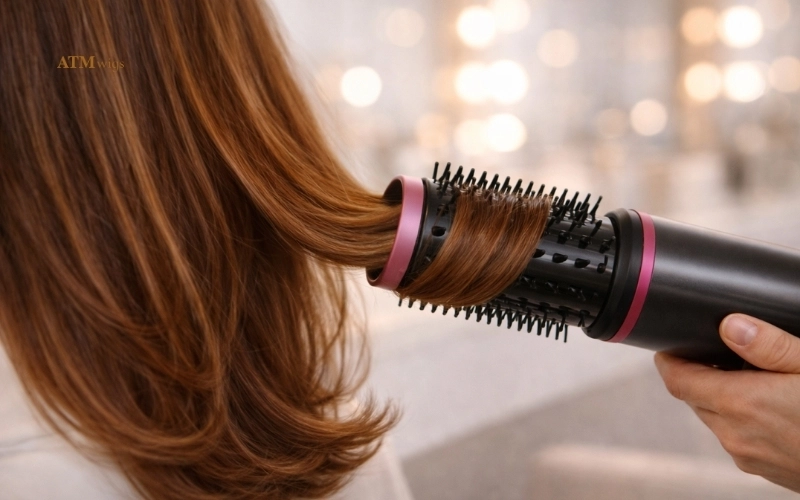
Method 3: Hot air brush (easy blowout control, no round brush)
A hot air brush combines airflow and heat in one tool, so it’s easier to coordinate than a dryer and brush.
How to get the blowout finish without over-drying
Start when hair is 70–80% dry. Work in small sections and keep the tool moving.
For lift, place the brush under the roots and gently raise. For a bend, rotate a quarter turn at the ends, then let the section cool before you touch it.
Hot air brushes are especially good for fine to medium hair that needs shape, not heavy heat.
Method 4: Flat iron + tension finish (polish the blowout)
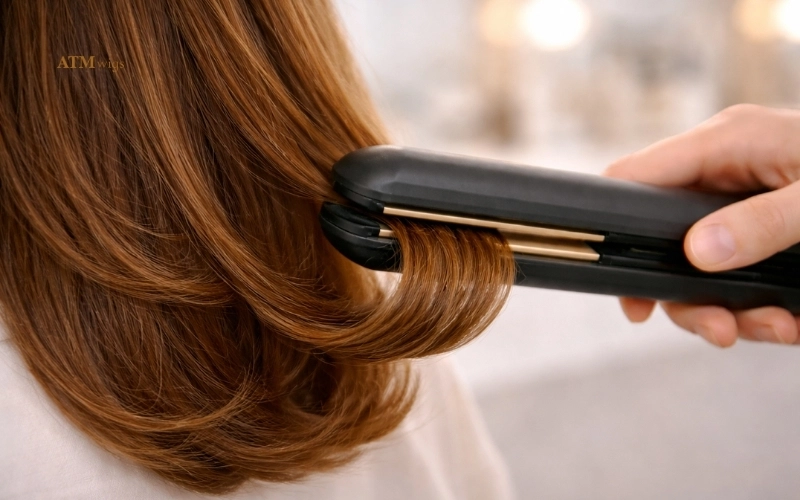
This isn’t a replacement for blow-drying—it’s a finishing move when you want glossy ends and a clean “tucked” shape.
The “bend, not straighten” technique
Hair must be fully dry and protected with heat protectant. Take a small section and keep light tension with a comb or fingers.
Glide the iron down, then at the last 2–3 inches rotate your wrist slightly inward (or outward) to create a soft bend.
Let the bend cool in your hand for a second before releasing. Cooling is what makes the shape last.
To keep it blowout-like, focus on the ends and top layer instead of pressing everything pin-straight.
Common blowout issues (quick fixes)
If your blowout isn’t landing, it’s usually one small tweak—not a full restart.
Frizz often means your airflow is pointed up or you’re using sections that are too big. Re-wet lightly, then do one slow downward pass with tension.
Flat roots usually happen when you dry the lengths first. Reheat the root area only, lift for a few seconds, then use a cool shot to set.
Ends that flip oddly are usually dried without control. Do one final pass with a paddle brush, or set just the ends with two large rollers while they cool.
If the cycle falls fast, you likely skipped the cool-down. Cool shots, rollers, or simply letting hair cool untouched for a minute helps the shape “lock.”
Choose the best method for your hair type
- Fine hair: Rollers or a hot air brush for volume; keep creams minimal.
- Thick hair: Paddle brush and dryer for control; add crown rollers if needed.
- Wavy hair: Paddle brush for sleekness or rollers for a softer blowout wave.
- Curly hair: More sections and paddle brush tension; rollers help set shape.
- Short hair/bangs: Dry in alternating directions first, then set with a cool shot.
Make your blowout last 2–4 days
Let hair cool completely before you brush aggressively or add heavy product. Warm hair collapses volume faster.
At night, loosely tie hair up and use a silk or satin pillowcase to reduce friction.
For day-two refresh, use dry shampoo at the roots and a quick low-heat smoothing pass on the top layer. In humidity, choose an anti-humidity mist instead of extra oil.
If you’re styling a human hair wig or topper
The same blowout methods work on human hair wigs and toppers, but keep tension gentle and secure the piece on a wig stand.
Use lower heat near lace or base areas, keep airflow moving, and rely on cool shots or rollers to set the shape rather than prolonged heat.
FAQs about how to blow out hair without a round brush?
Can you get a salon-style blowout without a round brush?
Yes. A paddle brush, dryer, rollers, and a hot air brush can all create smoothness and bounce when you use small sections and downward airflow.
What’s the easiest method for beginners?
Rollers after blow-drying are the most forgiving. It adds bounce even if your drying technique isn’t perfect.
How do I get volume at the roots without a round brush?
Dry roots first, lift sections upward, and set with a cool shot. Crown rollers are a simple add-on for longer-lasting lift.
Why does my blowout look frizzy?
Usually it’s airflow aimed upward/sideways or hair starting too wet. Use a concentrator nozzle, smaller sections, and roots-to-ends airflow.
Can I use a flat iron and still keep a blowout look?
Yes—use it only to bend and polish the ends, not to press hair flat from root to tip.
Now you know how to blow out hair without a round brush using four practical options that deliver smoothness, volume, and a soft bend that lasts. For human hair wigs, toppers, and toupees made to style beautifully, explore ATM Wigs’ services or browse the catalog.