You can change your appearance instantly with a wig, but it must be put on properly to appear natural and feel comfortable. If you are new to wigs or just need to know how to wear one properly, this tutorial will teach you how to put on a wig properly using professional techniques for a natural and secure fit.
Why Does Proper Wig Application Matter?
Proper wig application is important because improper application of a wig may lead to issues such as:
- Slippage, especially in public or while performing physical activities
- Scalp irritation due to friction or pressure points
- Visible or uneven hairline, which makes the wig unnatural
Proper wig application guarantees:
- Secure and comfortable fit
- Natural hairline appearance
- Maximum comfort even when worn all day
No matter whether you’re using wigs for medical or cosmetic reasons, learning how to properly put on your wig is just as important as choosing the right one.
Step 1: Preparing Your Natural Hair
To wear your wig, you first need to prepare your natural hair by flatting and tucking it away. Both comfort and appearance are reasons to do this.
Should You Wear a Wig Cap?
Yes, especially if:
- You have thick or long hair
- You want to protect your natural hair from friction
- You’re aiming for a smooth base under your wig
A wig cap helps hold the wig in place, minimizes slippage, and provides a breathable layer between your scalp and the wig. Some caps are made from nylon, while others are mesh or bamboo-based for better ventilation.
How to Flatten Your Hair Under a Wig

The flatter your hair is, the more naturally your wig will lie on your head.
Short Hair: Brush it back and pin it in place with styling gel or the wig cap itself. A little pomade can keep it in place.
Medium to Long Hair: Braid or twist hair flat against your scalp. Popular styles include:
- Two French braids pinned across the crown
- Low ponytails wrapped up in a flat bun
- Evenly placed pin curls on the head
Avoid bulky styles or concentrating hair in one area since it will create bumps beneath the wig and strain its shape.
Step 2: Choosing the Right Wig & Achieving the Perfect Fit
Selecting the right wig and size is important. A wig that’s too tight can lead to headaches or even damage the current hairline, whereas a loose wig will slip or shift.
Measuring Your Head for a Wig
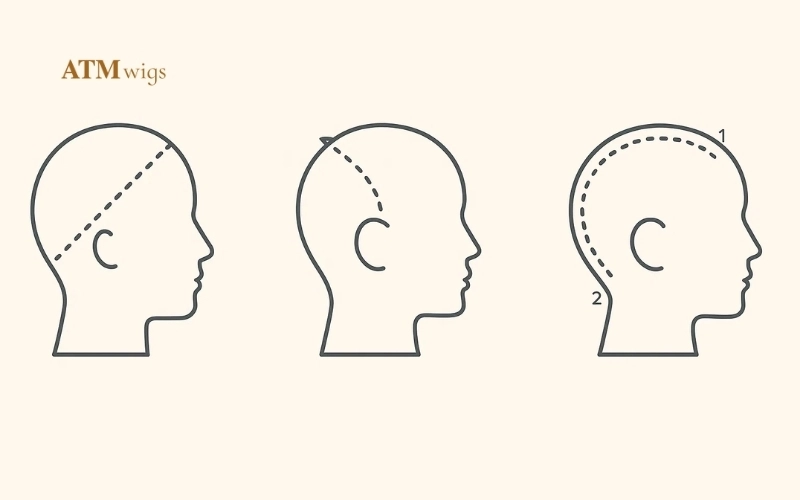
Measure with a flexible measuring tape to locate:
- Circumference of your head
- Front-to-nape length
- Temple-to-temple across the forehead
After taking your measurements, refer to the manufacturer’s size chart to select petite, average, or large wig sizes.
Types of Wigs to Use
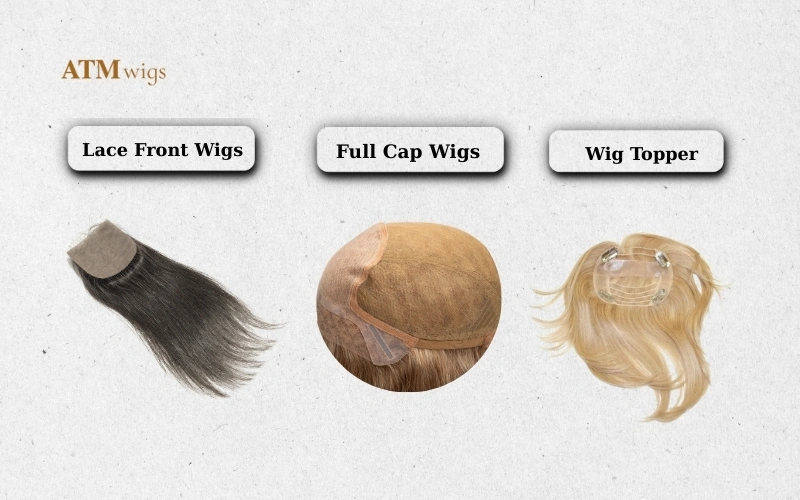
Lace Front Wig: Gives a natural hairline; ideal for styles that pull hair back.
Full Cap Wig: Offers full coverage and volume; ideal for total hair loss.
Wig Topper: Offers coverage on the crown or top for balding spots.
Most wigs come with adjustable straps, combs, or clips inside to assist with fit security.
Step 3: How to Put on a Wig Properly

With your natural hair prepared and your wig fitted correctly, it’s time to put on the wig.
Securing the Wig Cap
Make sure the cap completely covers your own hair and rests at your own hairline. This provides a flat foundation and keeps the wig from sliding.
If you do not wish to wear a cap, use styling gel or hairspray to style back the hair, giving a sleek foundation.
Step-by-Step Instructions for Putting on a Wig
- Take hold of the wig from the nape (back) with the inside out.
- Place the front of the wig at your forehead, aligning it with your natural hairline.
- Pull the rest of the wig over your head and push it into place.
- Secure with internal combs, adjustable straps, or clips.
- Adjust the ear tabs to rest symmetrically above your ears.
Best Ways of Securing Your Wig
- Wig Adhesive (Glue or Tape): Best suited for lace front wigs and long wear.
- Wig Grips: A soft band that is worn under the wig for added grip without adhesives.
- Clips/Combs: Generally built-in, ideal for quick on and off.
- Vacuum or Silicone Base Wigs: Ideal for those with complete hair loss who wish to have maximum hold.
Choose your chosen method based on scalp sensitivity and wear duration.
Step 4: Blending and Styling for a Natural Look

Following fixing of the wig, blending becomes a necessary aspect in order to achieve a natural look.
Lace Trimming (For Lace Front Wigs)
New lace front wigs come with excess lace. Using small, pointed scissors, cut the lace closely along your hairline. Cut in small increments to not cut too much.
Blending the Wig with Your Hairline
- Blend the lace into your skin color using a concealer and a makeup brush.
- Style baby hairs or edges to soften the front.
- Tuck small portions of your real hair out (if applicable) to blend the hairline.
- Spritz a light hold spray to style flyaways.
Common mistakes to steer clear of
- Incorrectly sized wig – is uncomfortable or slips.
- Applying too much glue – results in buildup and can hurt the lace or your skin.
- Failing to care for your natural hair underneath – results in breakage or hygiene concerns.
- Omitting trimming the lace – causes the wigline to appear unnatural.
Taking the time to do it right prevents unnecessary issues and lengthens the life of your wig.
Wig Care & Maintenance Tips

Caring for your wig keeps it fresh, increases its lifespan, and ensures it remains hygienic.
Cleaning Routine:
- Shampoo your wig with every 7–10 usages using sulfate-free shampoo.
- Use cool to lukewarm water—never hot water.
- Gently pat dry with a towel, then air dry on a wig stand.
Styling Tips:
- Prevent heat damage to synthetic wigs—use heat only if they are “heat-friendly.”
- Use leave-in conditioners or wig sprays for human hair wigs.
- Detangle gently with a wide-tooth comb or wig brush.
Storage Advice:
- Store on a wig stand so that its shape is not distorted.
- Do not expose to direct sun and moisture.
FAQs about How to Put on a Wig
How do you put on a wig for beginners?
Start off with a wig cap, push your own hair down, and hold the wig in place with straps or wig adhesive. Tuck in a little to achieve a natural fit.
Do I need a wig cap to wear with a wig?
A wig cap holds your hair and creates a flat base, but one is not required depending on your preference.
How do I keep my wig from moving?
Secure it to your head with wig grips, tape, or adjustable headbands so it will not slip throughout the day.
Will I need to glue on a wig?
No! Elastic bands, clips, and wig grips give a secure fit without adhesive sticks.
What is the best way to apply a wig correctly?
Ensure it is skin-tight, wear it on your natural hairline, and secure it with wig tape, combs, or straps for a natural look.
For best results, choose a properly fitting wig, place it on your own hairline, and hold it in place with wig tape, combs, or an elastic band. For lace-front wigs, trim away the excess lace and blend the rest with the wig foundation or concealer.
Mastering how to put on a wig correctly assures confidence, comfort, and flawless looks. With these expert tips, you’ll achieve a secure, natural appearance every time. Ready to find your best wig? Explore our collection at ATM Wigs today!